Originally pasted on Blogger January of 2020. This post uses the same photos, the text has minor updates.
I found this necklace on The Met’s Pinterest page, and several more, similar ones, from various sources. It’s a relatively easy thing to make (except the clasp; this particular one is a lovely piece that involves some soldering, and slightly more advanced skills). But this is a tutorial on the chain itself. I’ll make a subsequent post on making a simpler (still documentable) hook and eye closure, and then we’ll tackle something like the more complicated clasp in the original.
For now, the chain! I don’t have any beads similar to the original, so I just pulled some from my stash that seemed a similar enough size, and that looked nice together. I ended up not using one of the ones in the photo. I also have 20 gauge brass wire (the original is gold), round nose pliers, wire cutters, and not pictured, some needle nose pliers. 22 or 24 gauge wire would also be suitable. 24 would be very fine, and fiddly, and inconsistent with most period necklaces that I’ve looked at in the last six years. There is documentation for wire that fine having been used in ancient times, but not, as far as I can tell, in this context. Gauge or wire thickness is never indicated in museum notes, but you can get a sense of scale usually.

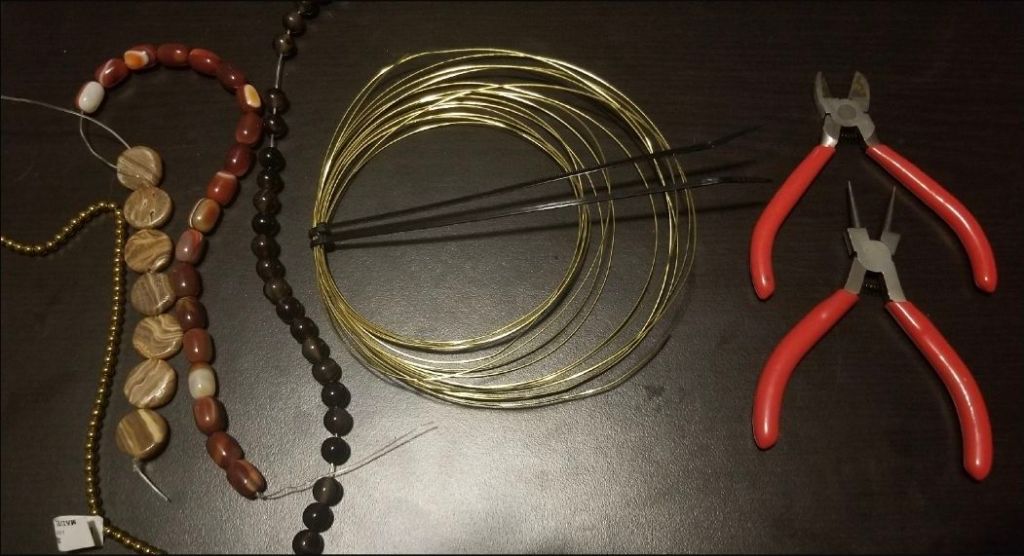
Each link is a piece of wire, and a bead, and you build the chain as you add links. Each of my wires was cut to around 9 cm. Cut longer pieces to start out with, if you’re new at this. The longer your tails are, the easier it is to manipulate them. 12 cm would be a good length, if your beads are similar to mine.
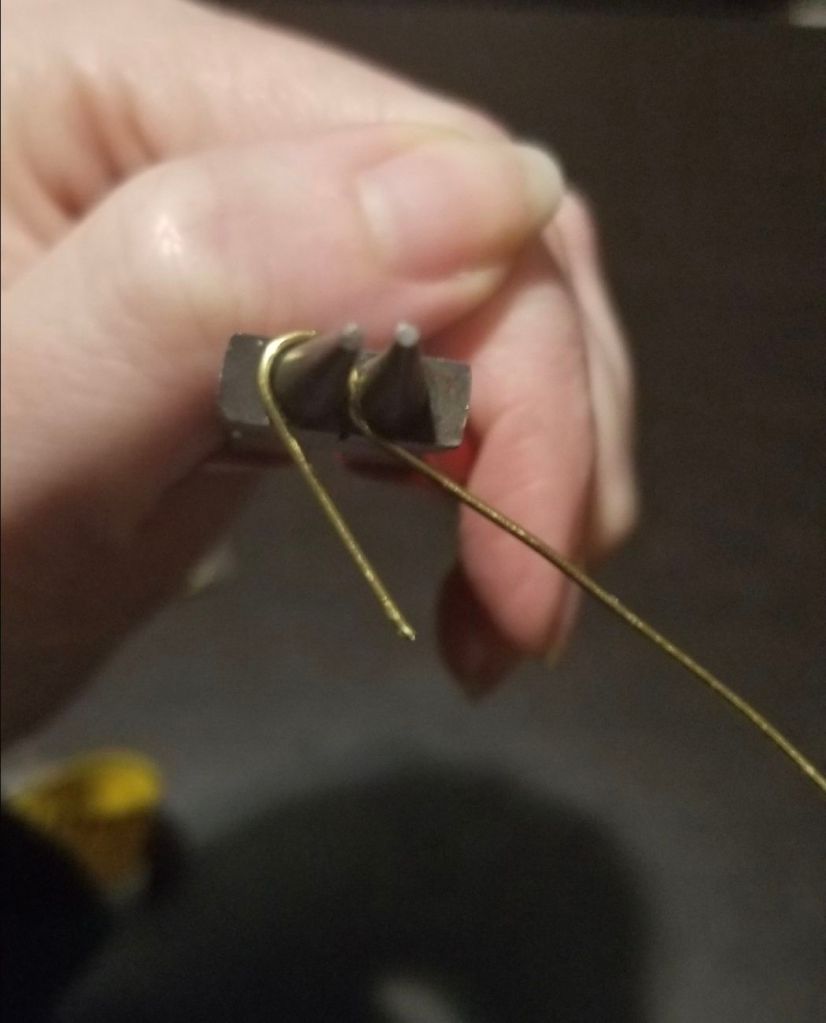
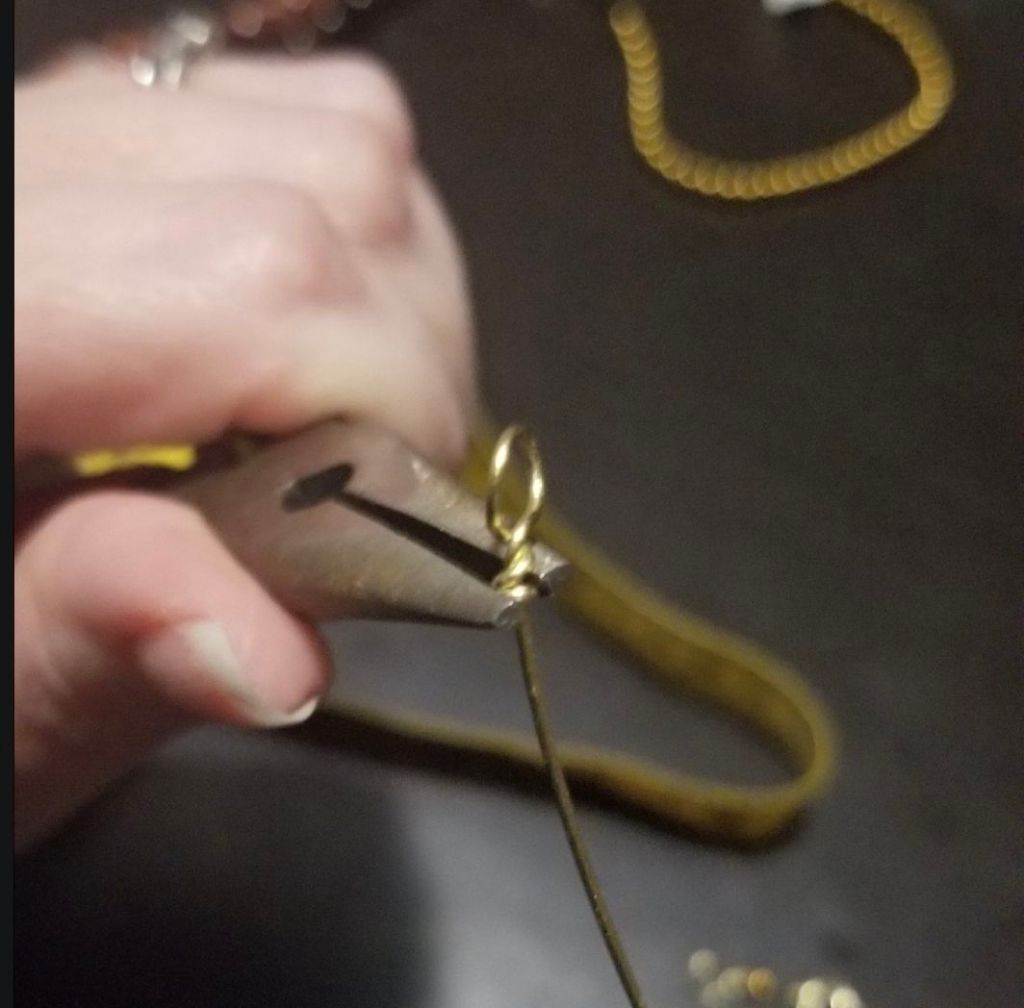
Use your round nose pliers to make a large-ish eye. I had about 3 cm of wire at that initial bend, making up the eye. 3-4 cm is an okay length to work with. Any shorter is more difficult.
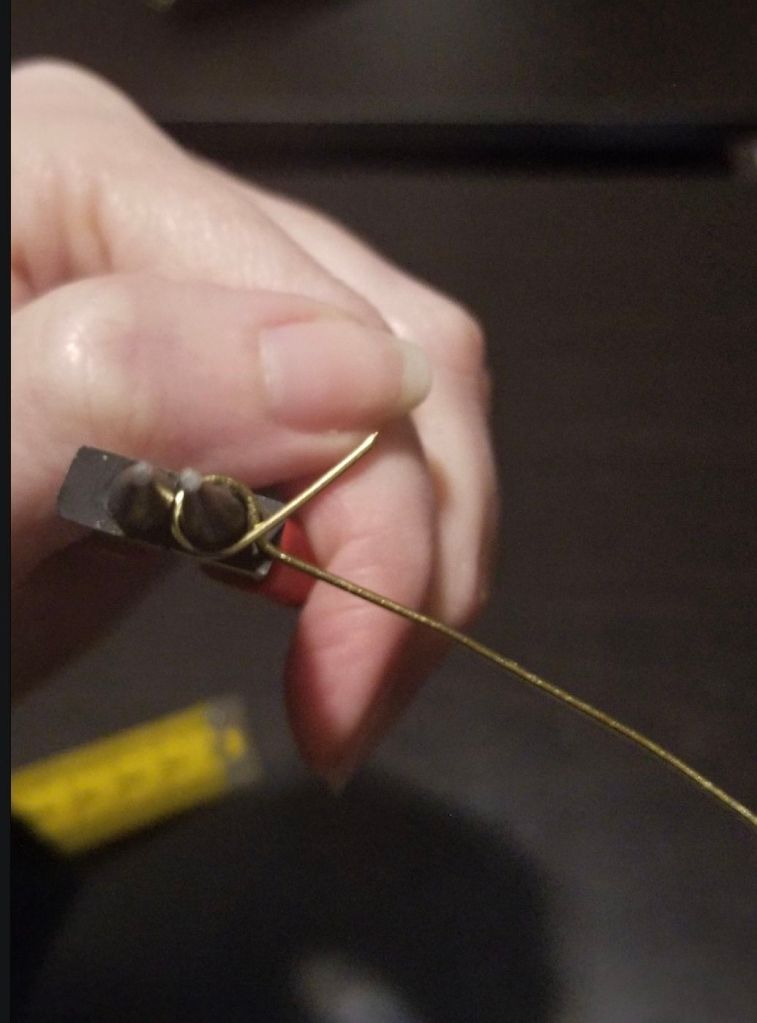
Continue until it looks like this. A full loop.
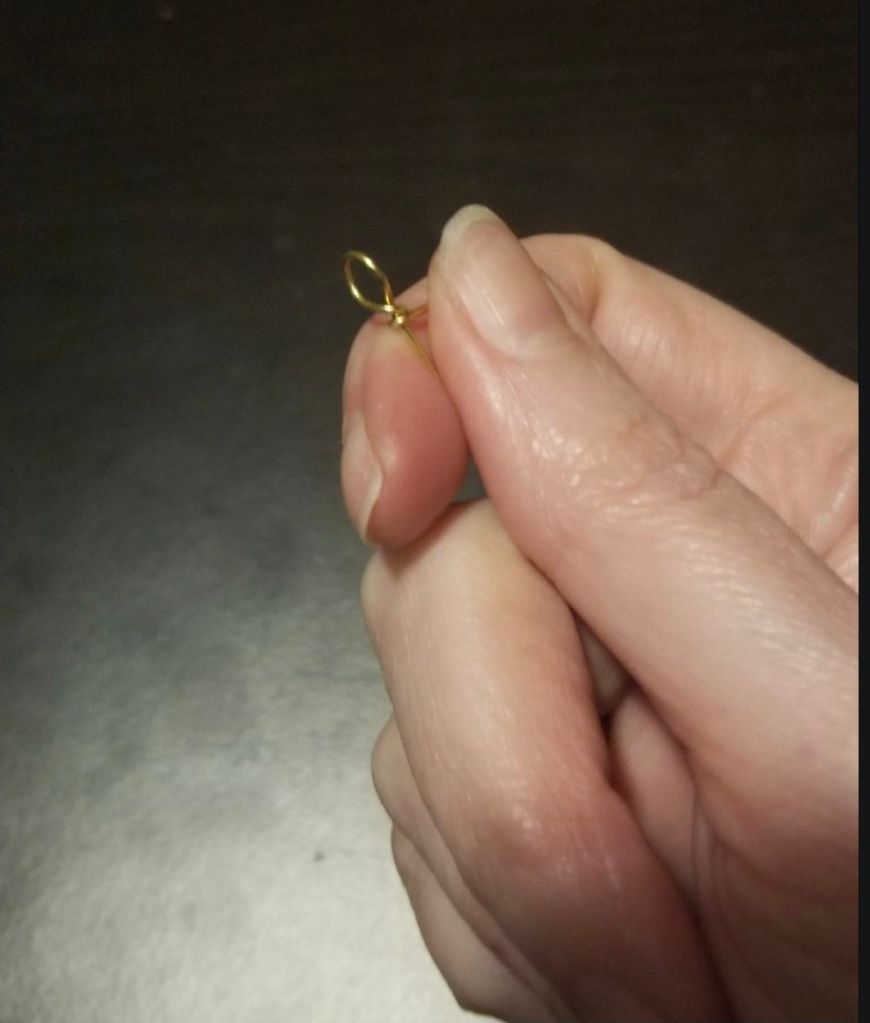
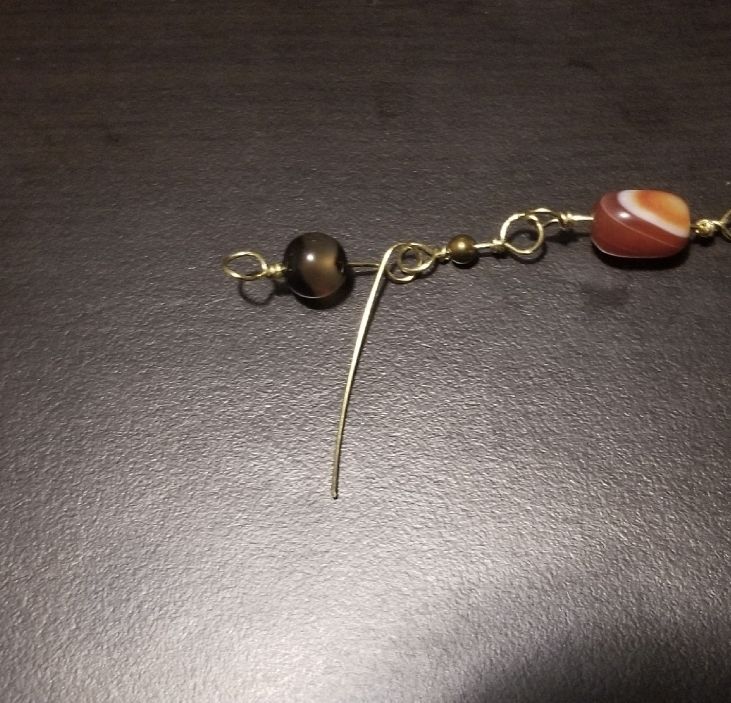
Use your pliers to twist the short end around a couple of times. Keep the spiral close and tight. Flat nose or round nose pliers work and practice really helps. You can use your pliers to snug your spiral up close to your loop, as well.
Cut the end of the wire close to the spiral. Use needle nose or chain nose pliers to tighten up the cut end as much as possible.
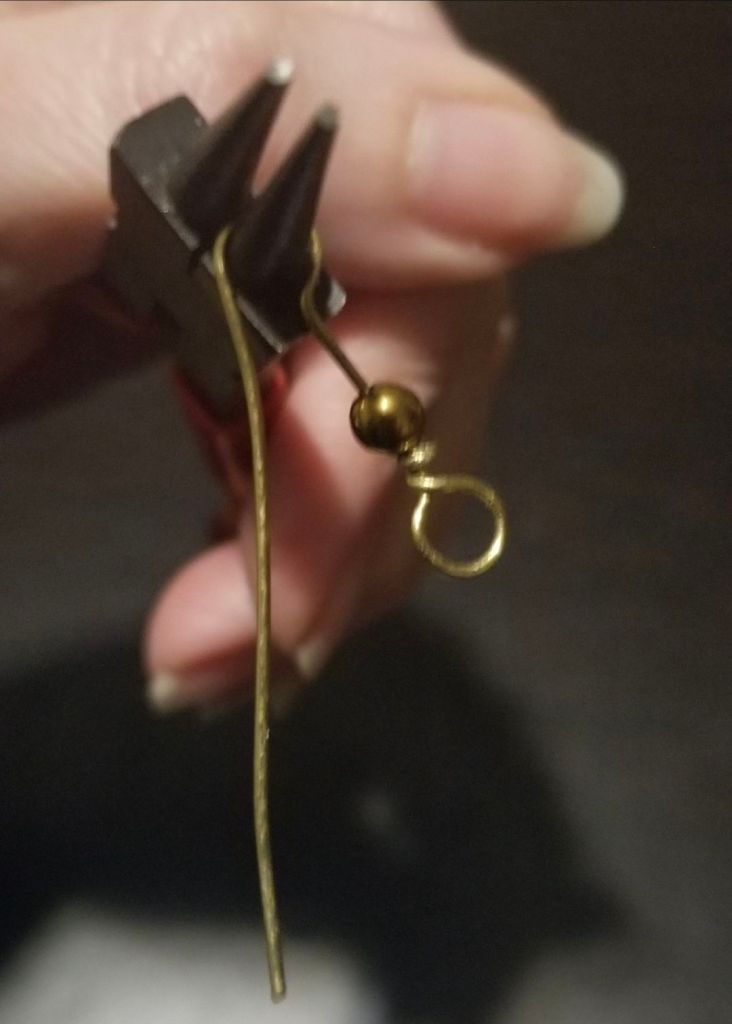
Slide a bead on and close the other end up. This is the only time you’ll close both sides without adding a link first.
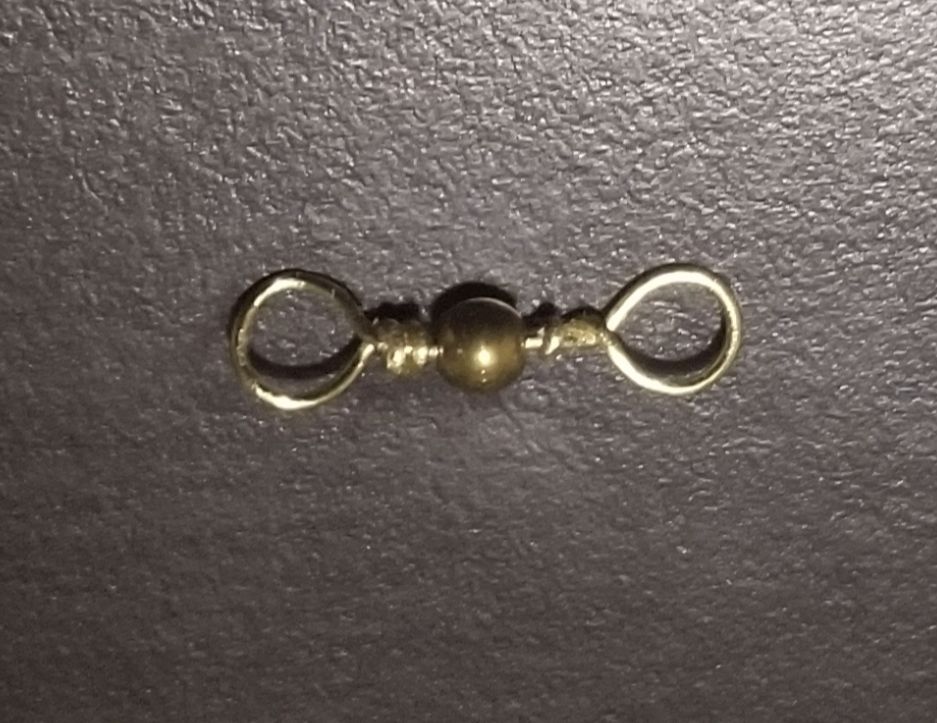
One link done
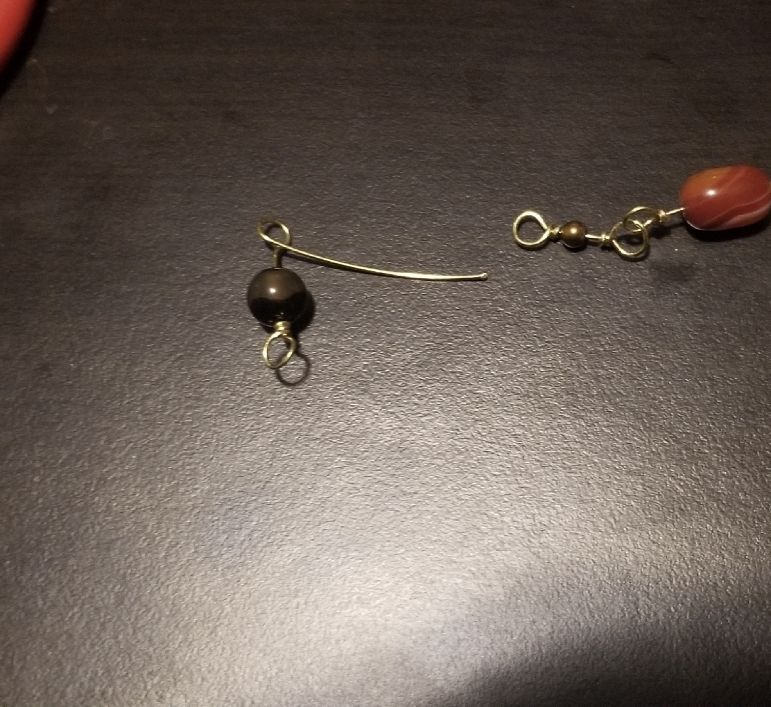
Repeat the first few steps up to adding a bead. I’ve obviously done a few more here, but trust me, this is all rinse and repeat from here. When you get your next link to the point in the photo, go ahead and slide that tail onto your existing link, so that the eyes are linked.
Like this!
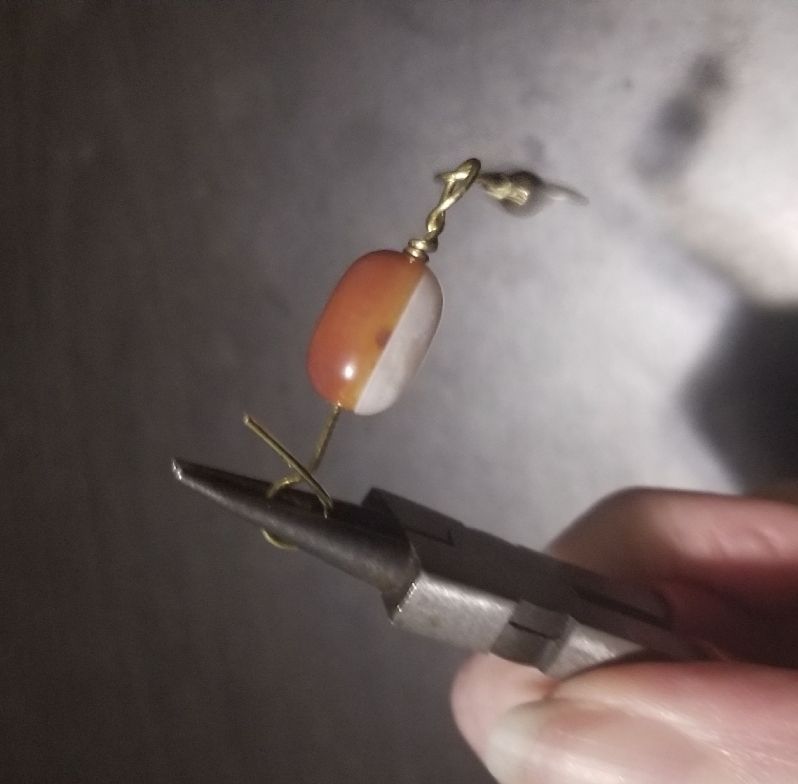
Sorry about the beads changing, these were better photos of this step. I find it easiest to grasp the eye with pliers at this point, and then finish off this link. Contine adding links in the pattern of your choice until the necklace is the length you want.
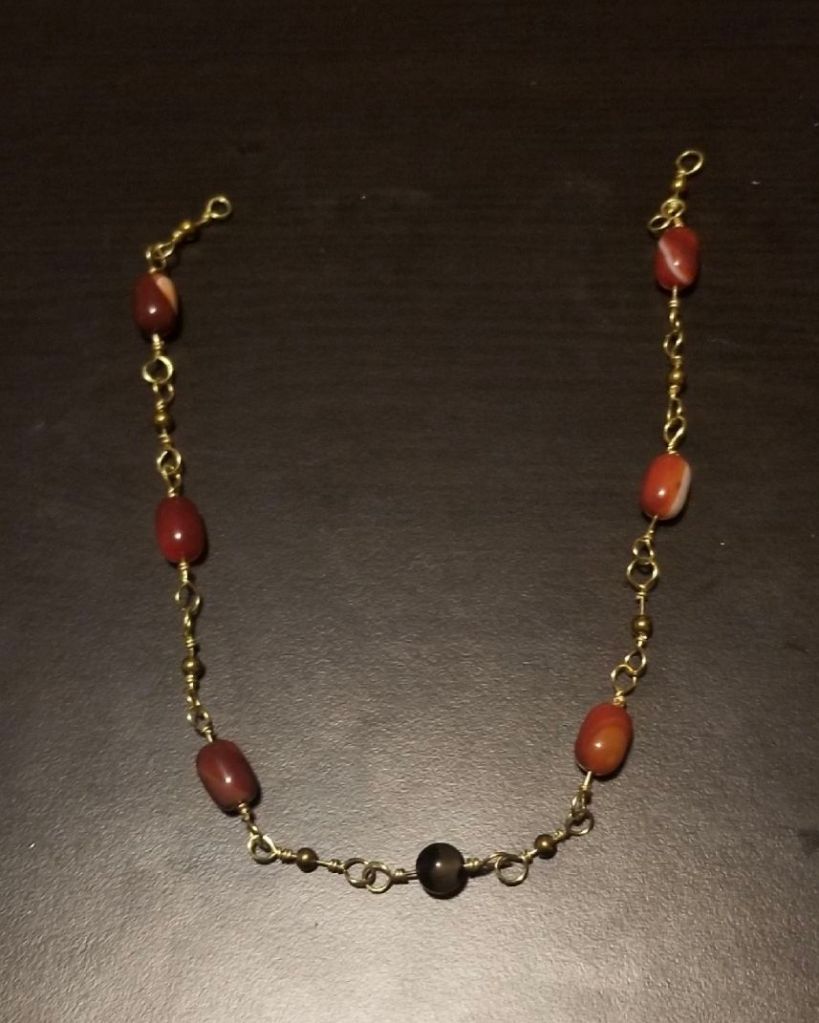
The original necklace is about 17.5″ overall, so I made this one around 16.5″. The rest of the length will come from the hook and eye.

Leave a comment